
From transforming healthcare to revolutionizing finance, Artificial Intelligence (AI) and Machine Learning (ML) workloads have become crucial drivers of innovation. These data-centric tasks, however, demand immense computational power, making GPU deployment a game-changer. VMware’s Tanzu Kubernetes Grid Service (TKGS) equipped with vGPU support emerges as the ideal solution, enabling AI/ML workloads to harness the full potential of virtualized GPUs.
In this blog post, we will see how to deploy AI/ML workloads on TKGS clusters with vGPU support.
Prerequisites
Before we dive into the deployment process, ensure you have the following prerequisites in place:
- Up and Running TKGs: Tanzu Kubernetes Grid Service must be operational on your vSphere environment. (Check from vCenter -> Workload Management.)
- GPU Installed on Host: Your ESXi hosts should have compatible NVIDIA GPUs installed and recognized by the system.
- NVIDIA VIB Installed on ESXi: Verify that the NVIDIA driver is installed on ESXi (esxcli software vib list | grep NVIDIA)
For detailed instructions on installing the NVIDIA VIB on ESXi hosts, you can refer to the official VMware documentation provided here.
My Environment
vCenter: 8.0.1
ESXi: 8.0.1
GPU: NVIDIA A10
Deployment
Step 1: Create a Custom VM Class with a vGPU Profile
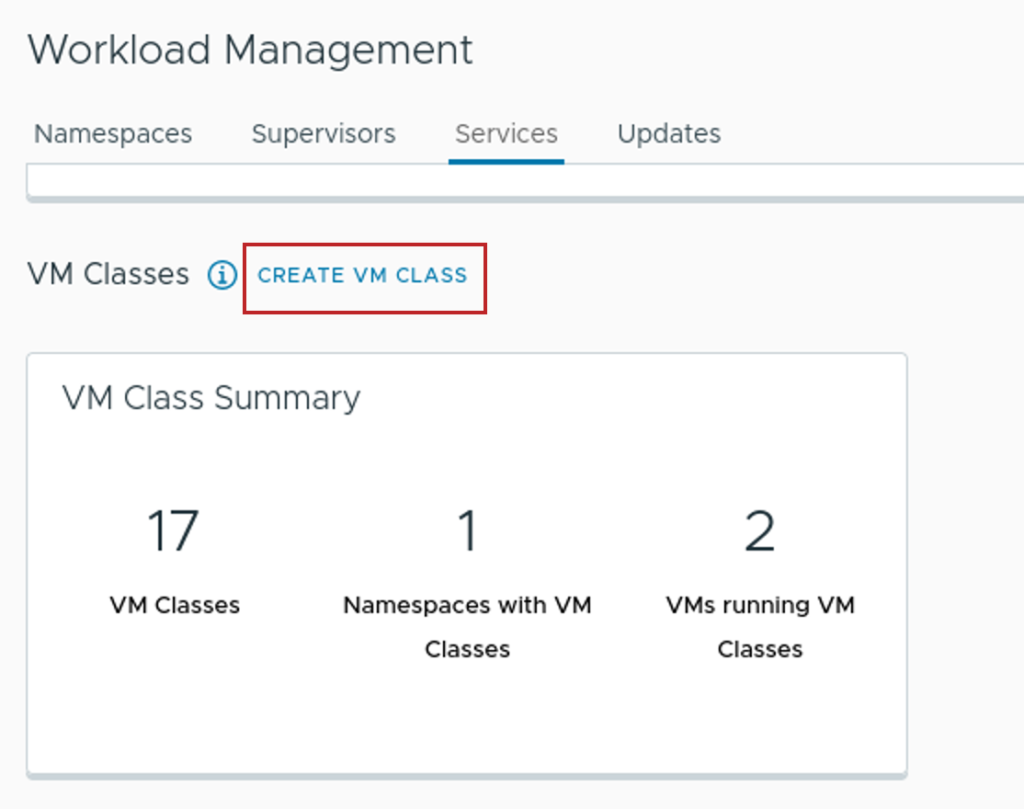
Login to vCenter -> Workload Management -> Services -> Click Manage under “VM Service”
Click “Create VM Class”
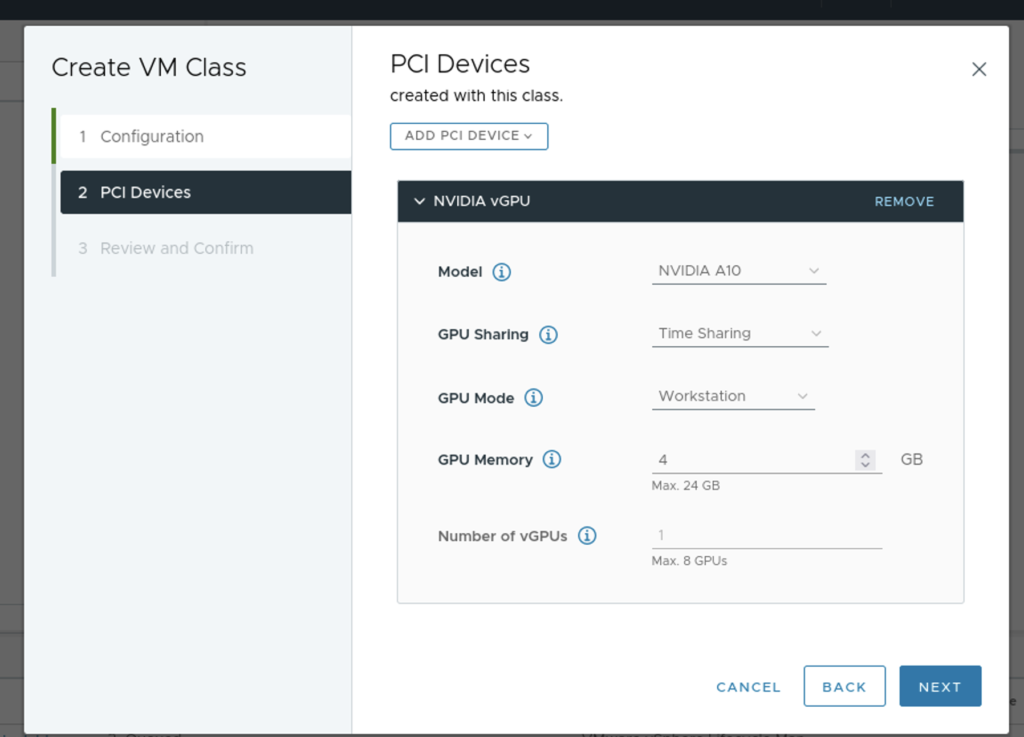
Please note we have to select PCI Devices (100% Mem reservation)

Select your PCI Device
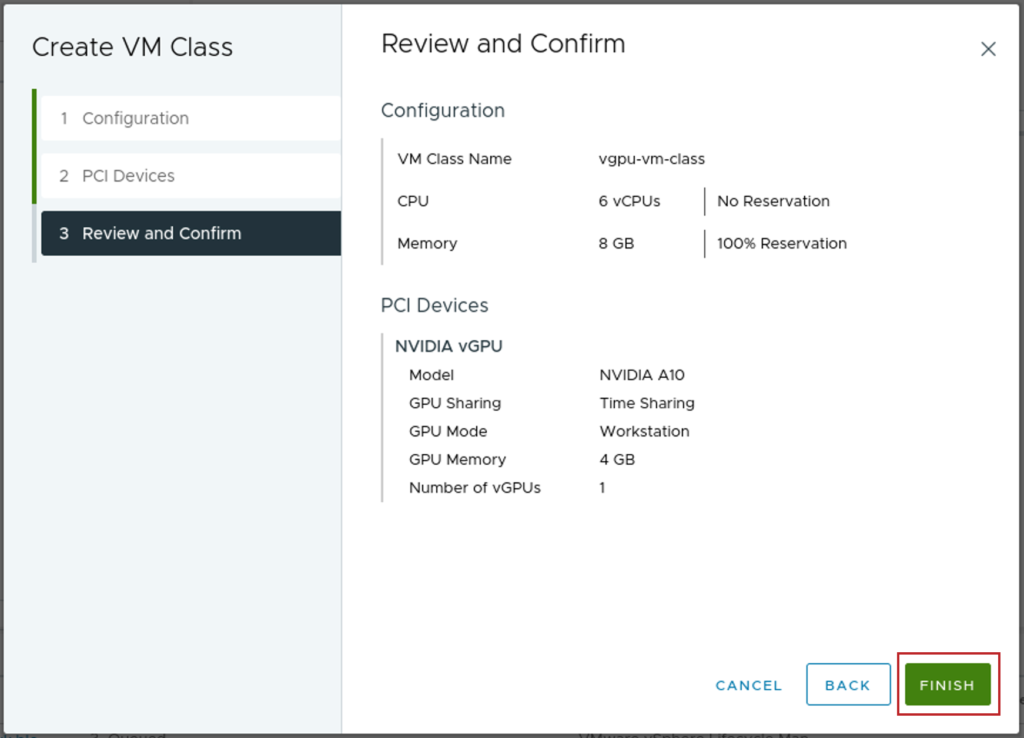
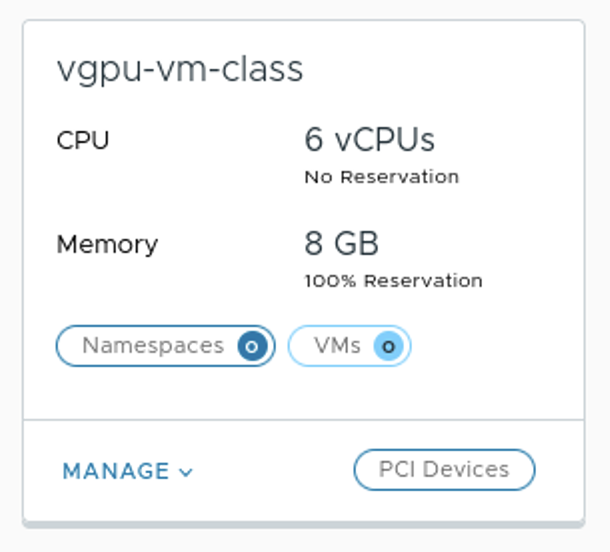
Verify that the new custom VM Class is available in the list of VM Classes.
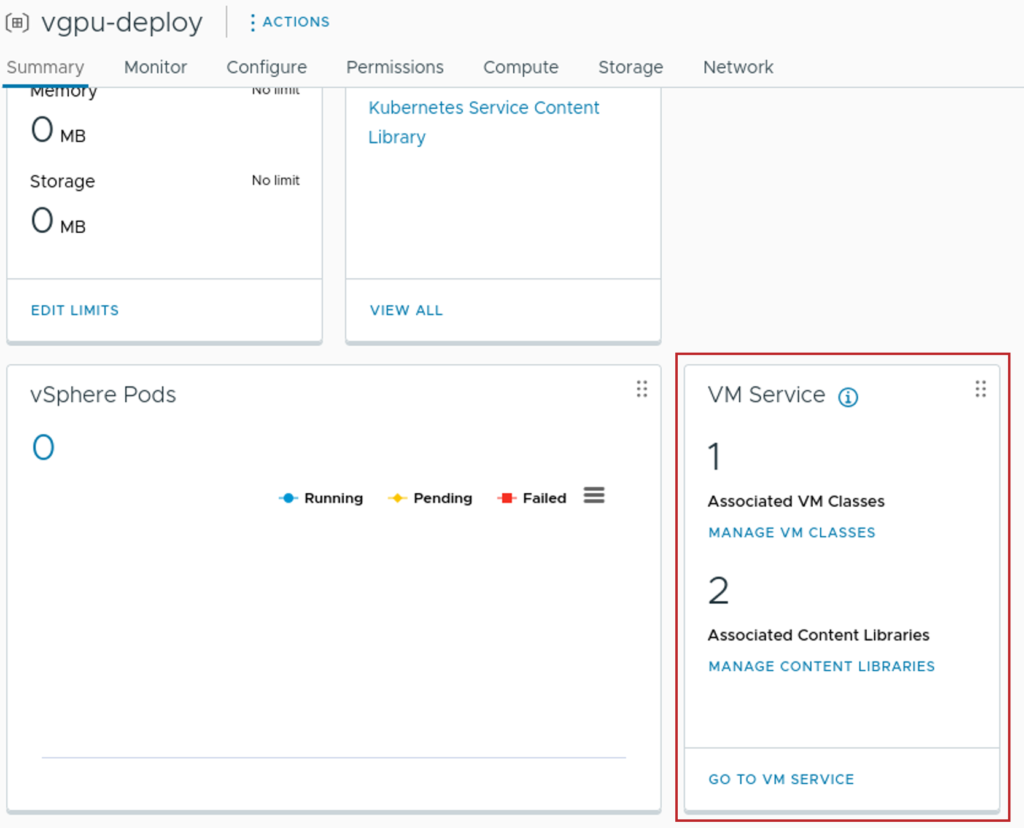
Step 2: Create a Namespace and add VMclass and Content Library
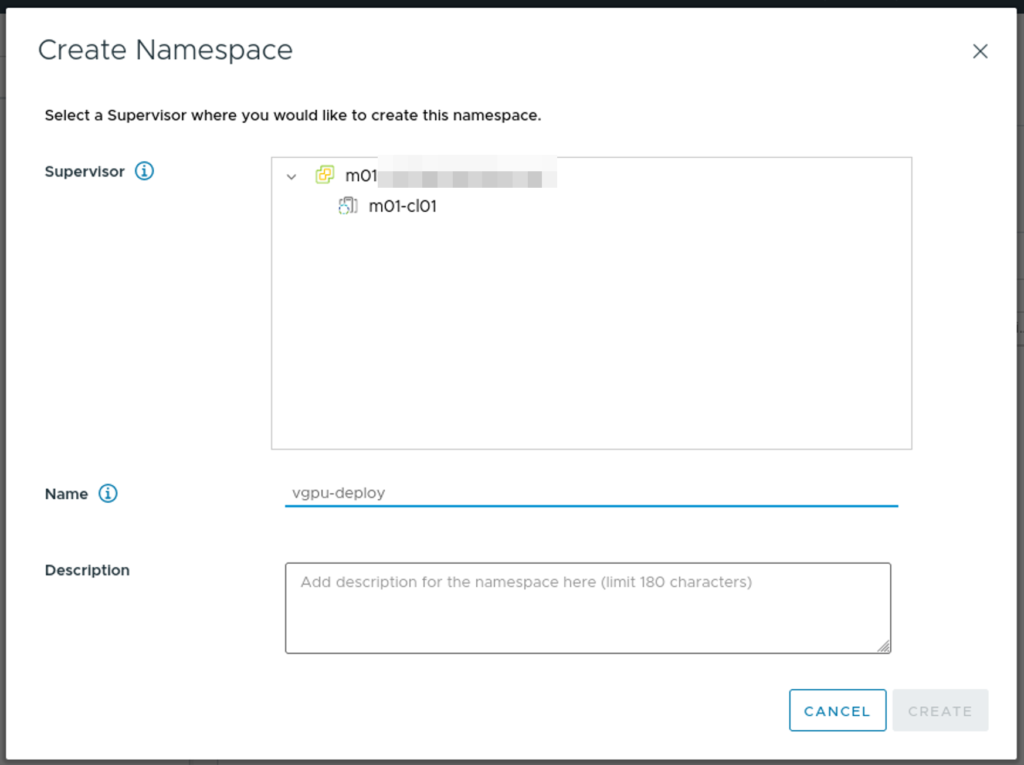
Add the custom VM Class which we created in Step 1 and your TKGs Content Library
Step 3: Install kubectl vSphere and login to Supervisor Cluster
curl -LOk https://Control Plane Node Address/wcp/plugin/linux-amd64/vsphere-plugin.zip
unzip vsphere-plugin.zip
mv -v bin/* /usr/local/bin/
kubectl vsphere login --server=IP-ADDRESS --vsphere-username USERNAME --insecure-skip-tls-verify
Step 4: Prepare yaml to deploy the vGPU cluster
Switch to the context we created in Step 2


kubectl config get-contexts
kubectl config use-context vGPU-NAMESPACE
kubectl get virtualmachineclassbindings
Create a yaml file to deploy the cluster
apiVersion: run.tanzu.vmware.com/v1alpha2
kind: TanzuKubernetesCluster
metadata:
   #cluster name
   name: tkgs-cluster-gpu-a10
   #target vsphere namespace
   namespace: vgpu-deploy
spec:
   topology:
     controlPlane:
       replicas: 1
       #storage class for control plane nodes
       #use `kubectl describe storageclasses`
       #to get available pvcs
       storageClass: tkgs-sp
       vmClass: guaranteed-medium
       #TKR NAME for Ubuntu ova supporting GPU
       tkr:
         reference:
           name: 1.22.9---vmware.1-tkg.1
     nodePools:
     - name: nodepool-a10-primary
       replicas: 1
       storageClass: tkgs-sp
       #custom VM class for vGPU
       vmClass: vgpu-vm-class
       #TKR NAME for Ubuntu ova supporting GPU
       tkr:
         reference:
           name: 1.22.9---vmware.1-tkg.1
     - name: nodepool-a10-secondary
       replicas: 1
       vmClass: vgpu-vm-class
       storageClass: tkgs-sp
       #TKR NAME for Ubuntu ova supporting GPU
       tkr:
         reference:
           name: 1.22.9---vmware.1-tkg.1
   settings:
     storage:
       defaultClass: tkgs-sp
     network:
       cni:
        name: antrea
       services:
        cidrBlocks: ["198.51.100.0/12"]
       pods:
        cidrBlocks: ["192.0.2.0/16"]
       serviceDomain: managedcluster.local
Step 5: Deploy the cluster
kubectl apply -f vgpu-cluster.yaml
TKC cluster with vGPU has been deployed. Hope this helps!