
Introduction:
In this post, I will explain how to expand disk space on a Linux system using Logical Volume Manager (LVM). Whether you’re dealing with a physical or virtual disk, this step-by-step tutorial will help you make the most of your storage without the need for a system reboot.
Step 1: Increase Disk Size
The first step is to increase the size of the disk that your Linux OS uses. This can be done by expanding the virtual disk in virtualization platforms like VMWare, KVM or Hyper-V. For this post, we’ll extend a 16 GB disk to 30 GB.
My Lab Details:
Hypervisor: VMware ESXi
VM: Ubuntu 22.04.1 LTS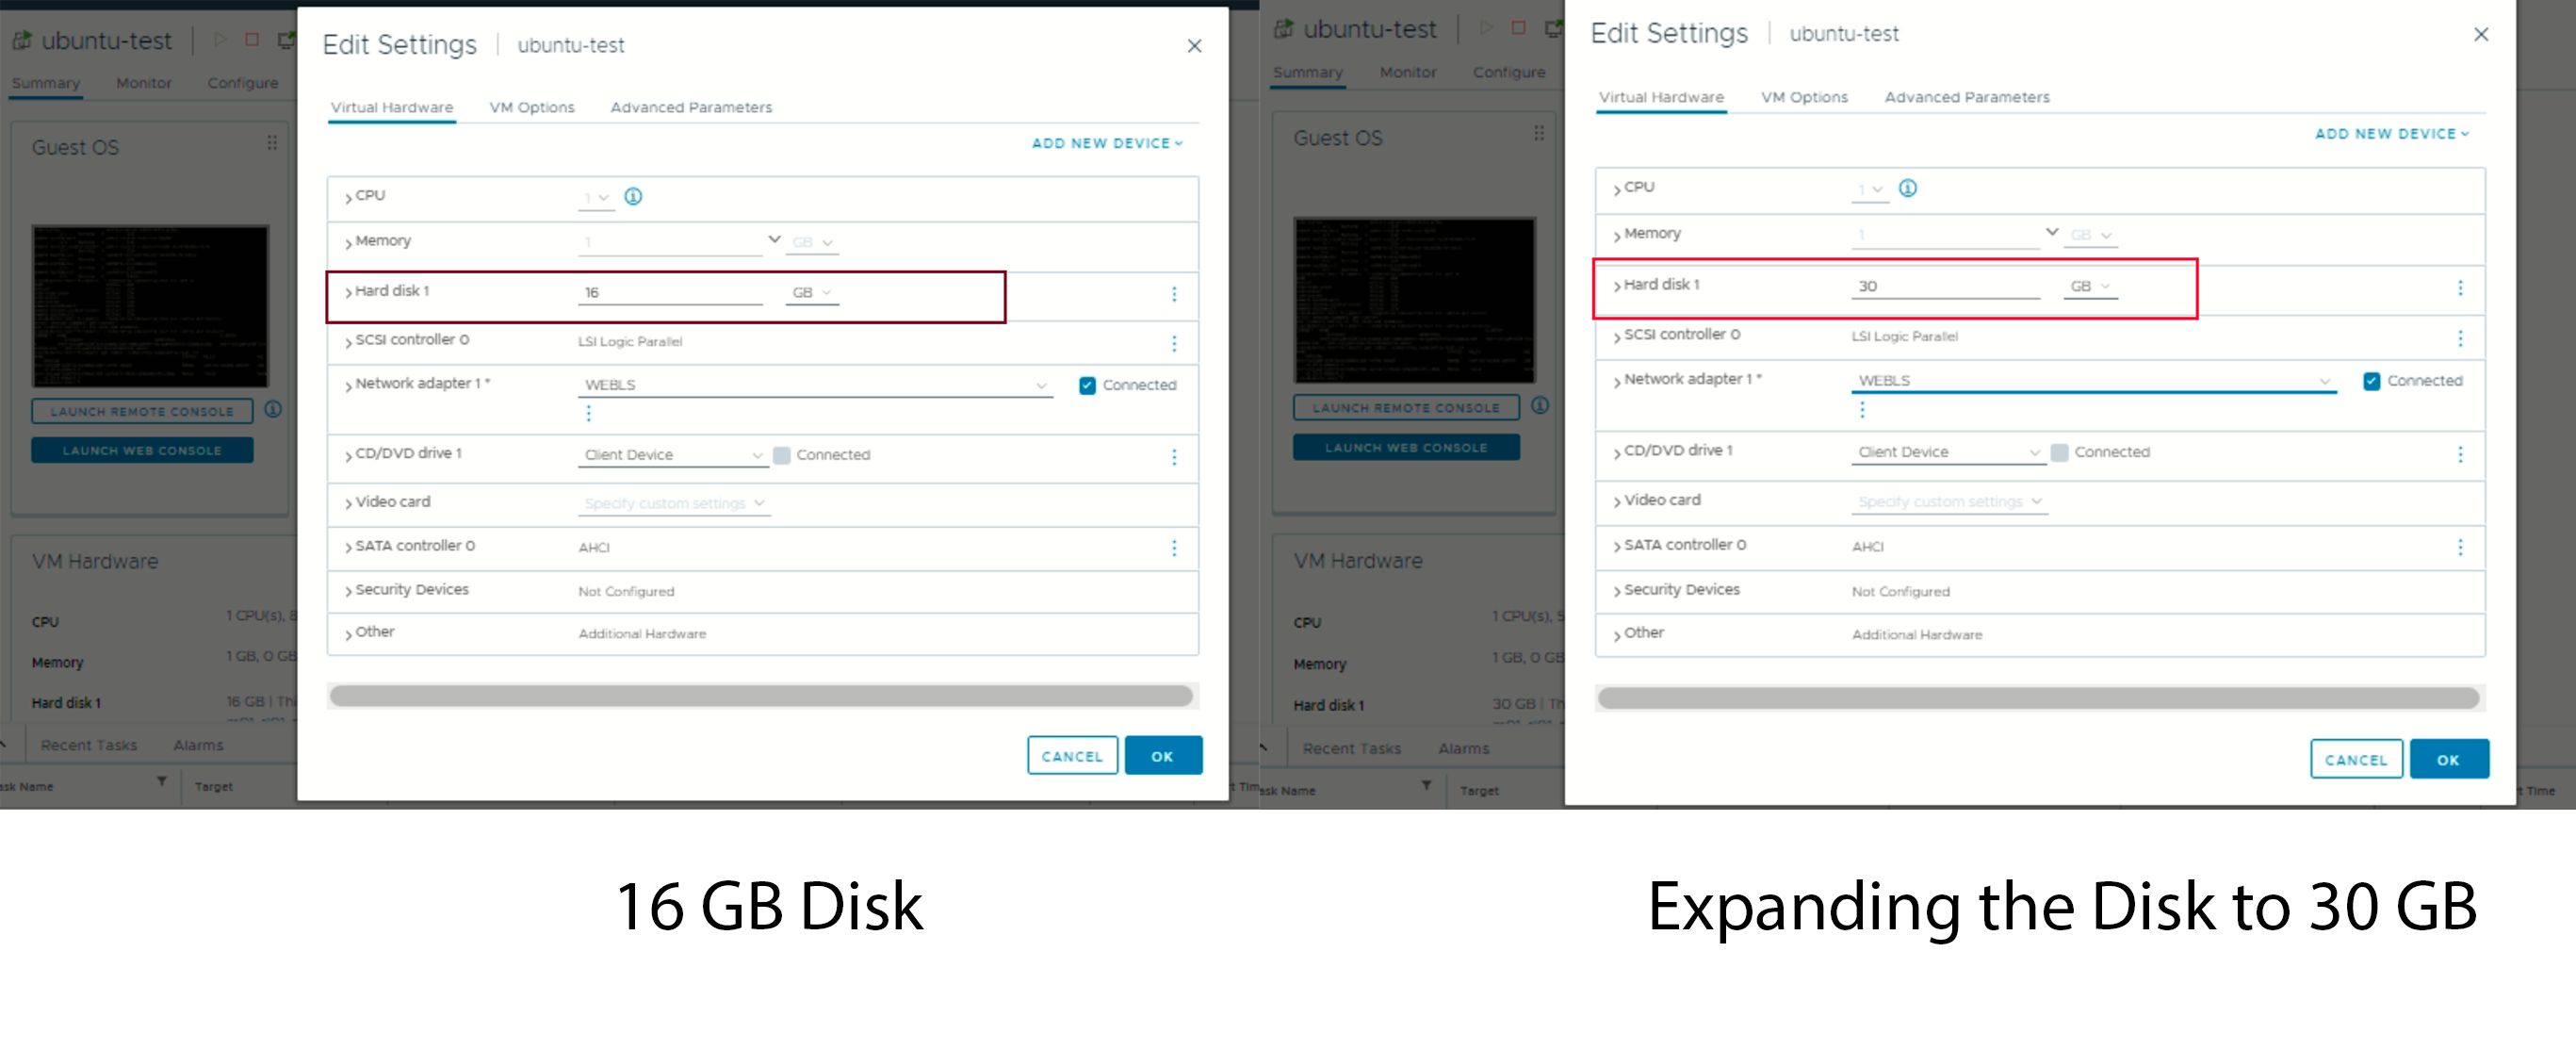
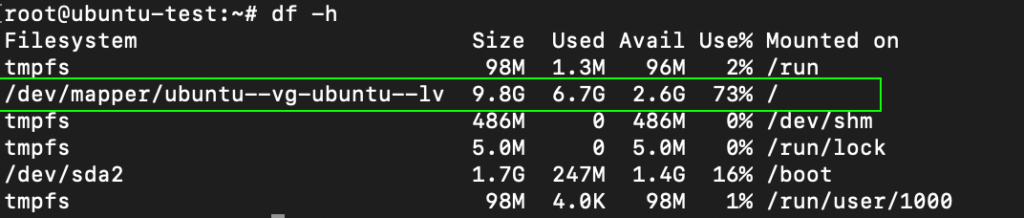
root@ubuntu-test:~# df -h
Filesystem                         Size  Used Avail Use% Mounted on
tmpfs                               98M  1.3M   96M   2% /run
/dev/mapper/ubuntu--vg-ubuntu--lv  9.8G  6.7G  2.6G  73% /
tmpfs                              486M     0  486M   0% /dev/shm
tmpfs                              5.0M     0  5.0M   0% /run/lock
/dev/sda2                          1.7G  247M  1.4G  16% /boot
tmpfs                               98M  4.0K   98M   1% /run/user/1000
Disk is still not visible/listed
Step 2: Rescan the Disk
After resizing the disk, you may need to prompt Linux to recognize the additional free space. To check for free space, run the cfdisk command and see if it lists free space. Use “q” to exit when done. If there’s no free space listed, initiate a rescan for /dev/sda with the command:
echo 1 > /sys/class/block/sda/device/rescanOnce done, rerun cfdisk, and you should now see the free space.

Step 3: Resize the Partition
Select your /dev/sda3 partition from the list and choose “Resize” from the menu. Hit ENTER and confirm the new size. Then select “Write,” type “yes” to confirm, and hit ENTER. Finally, use “q” or select quit to exit the program. Your /dev/sda3 partition should now reflect the new, larger size.

Step 4: Extend the Physical Volume (PV)
With the LVM partition backing up the /dev/sda3 PV extended, it’s time to extend the PV itself.
Run
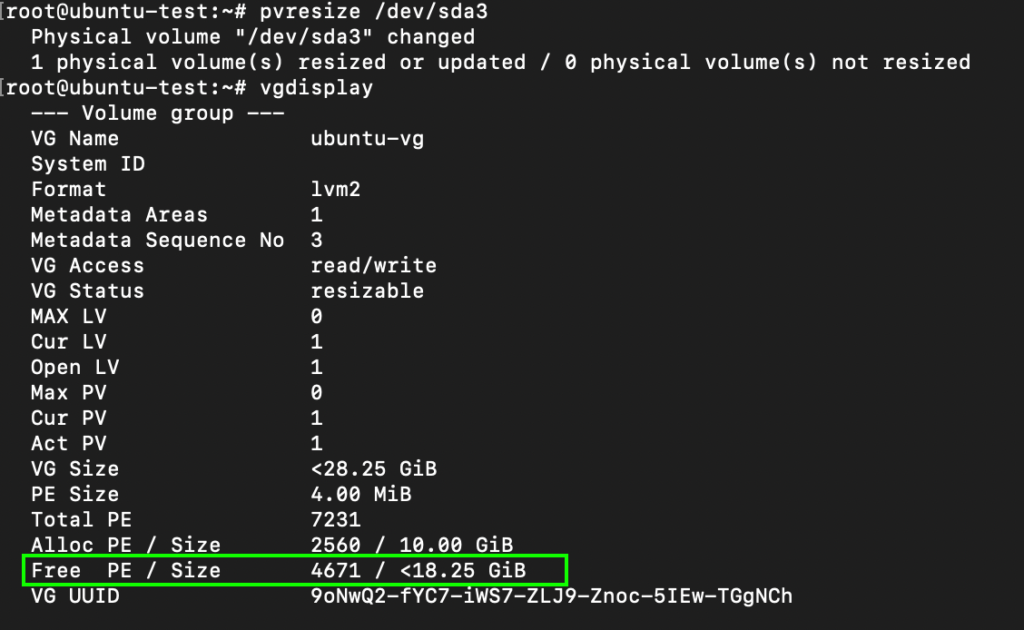
pvresize /dev/sda3 to accomplish this, and then use pvdisplay to verify the new size. In our example, the PV has increased from 14.2GB to 28.2G.
Step 5: Check Volume Group (VG) Free Space
Now, check the VG’s free space using vgdisplay. In our case, there’s 18.25 GiB of free space available within the VG.
Step 6: Extend Logical Volume (LV)
Use lvdisplay to verify the size of your upstream Logical Volume (LV). Extend the LV to use all available VG free space with the below command
lvextend -l +100%FREE /dev/ubuntu-vg/ubuntu-lvCheck the LV one more time with lvdisplay to ensure it’s been extended.
root@ubuntu-test:~# lvextend -l +100%FREE /dev/ubuntu-vg/ubuntu-lv
  Size of logical volume ubuntu-vg/ubuntu-lv changed from 10.00 GiB (2560 extents) to <28.25 GiB (7231 extents).
  Logical volume ubuntu-vg/ubuntu-lv successfully resized.
root@ubuntu-test:~# lvdisplay
  --- Logical volume ---
  LV Path                /dev/ubuntu-vg/ubuntu-lv
  LV Name                ubuntu-lv
  VG Name                ubuntu-vg
  LV UUID                xL1oCY-qBRL-cT86-jRRr-0cWK-0P4W-U0Y1Dp
  LV Write Access        read/write
  LV Creation host, time ubuntu-server, 2023-04-12 11:44:17 +0000
  LV Status              available
  # open                 1
  LV Size                <28.25 GiB
  Current LE             7231
  Segments               1
  Allocation             inherit
  Read ahead sectors     auto
  - currently set to     256
  Block device           253:0
Step 7: Resize the File System
At this point, the block volume supporting your root filesystem has been expanded, but the filesystem itself needs resizing. Run df -h to check the current filesystem size. Use the below command to resize it, and run df -h once more to confirm the new available space.
resize2fs /dev/mapper/ubuntu--vg-ubuntu--lv 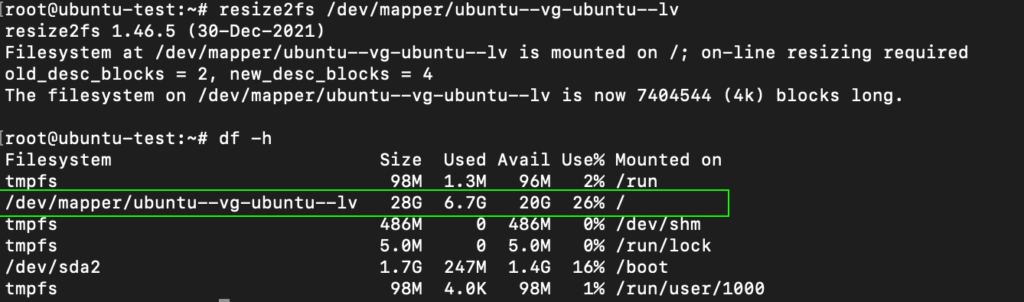
Following the above steps, you can successfully expand your Linux Machine/VM physical or virtual disk space using LVM. This allows you to efficiently manage your storage resources and accommodate growing storage needs without disrupting your system. Hope this helps.